This guide will teach you how to change Kodi skin. You will how to do it both through the Kodi Settings and by using a ZIP file. The Process was realized on Kodi 19 Matrix and applies to all devices and platforms that support kodi media center.
One of the things Kodi is successful for is the ability to customize it. The appearance of Kodi is very good right from the start, and it also improves with each version. The interface of Kodi 19 Matrix is very similar to that of Kodi’s older versions, but it is cleaner and more intuitive. Despite this, there are many skins that you can apply to Kodi to change its appearance and customize it as you like.
How to change Kodi Skin from the settings
To change the code skin from the options of the application itself, you must open Kodi and follow these steps:
Go to the Kodi home screen and access the settings. To do this, click on the gear icon above the menu; at the top left of the screen.
In the Kodi settings menu, click on Interface.
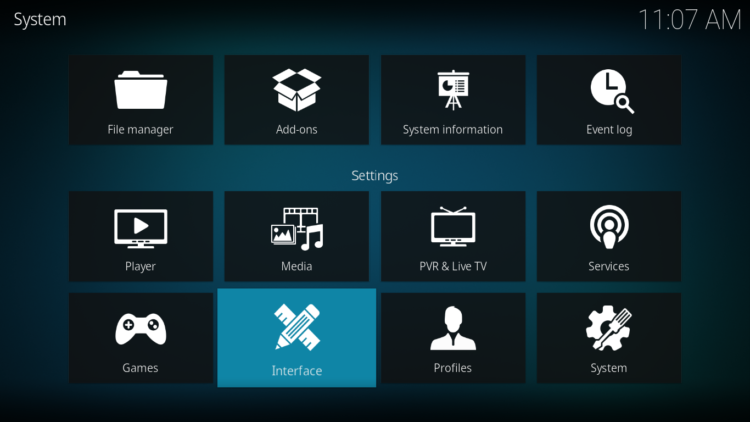
Next, click on Skin in the menu on the left.
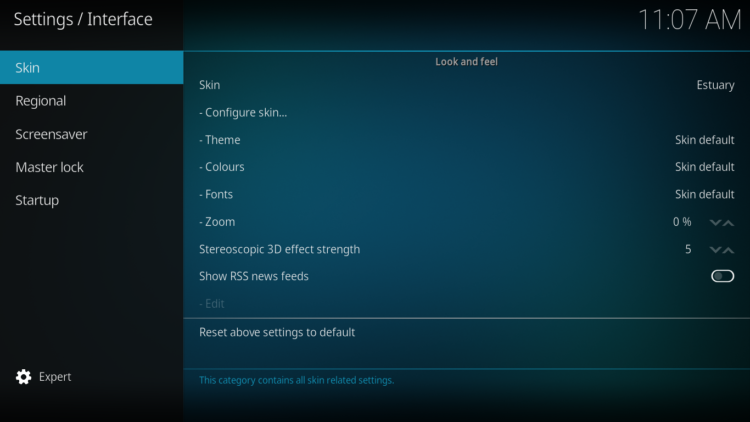
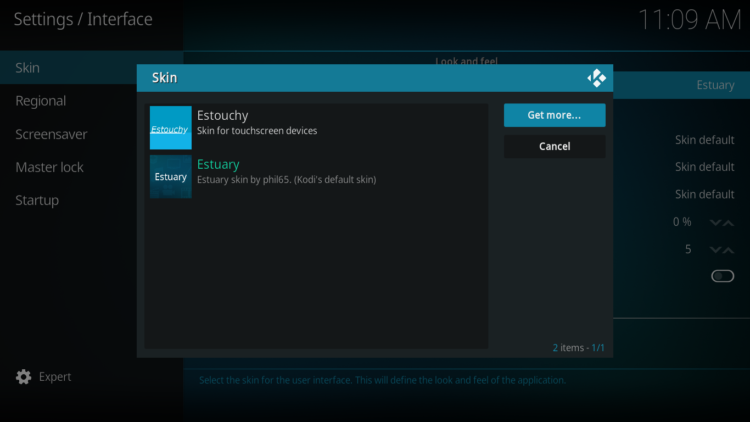
Several options will be displayed on the right. If you click on Skin, you will be able to see a list of installed skins.
A new window will open where you can select different skins for Kodi. Only those skins that are installed will appear in the list. If you click on a skin, you will be able to select and activate it. To get more skins, click the Get More button.
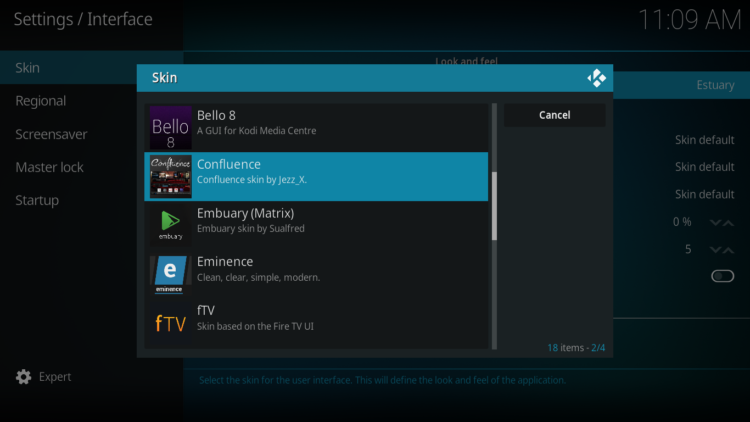
When you click on the button to get more skins, you will see a list with all skins registered in Kodi. If you select any of these skins it will be downloaded and activated automatically. Select the one you like the most. In this example, we select the Confluence skin.
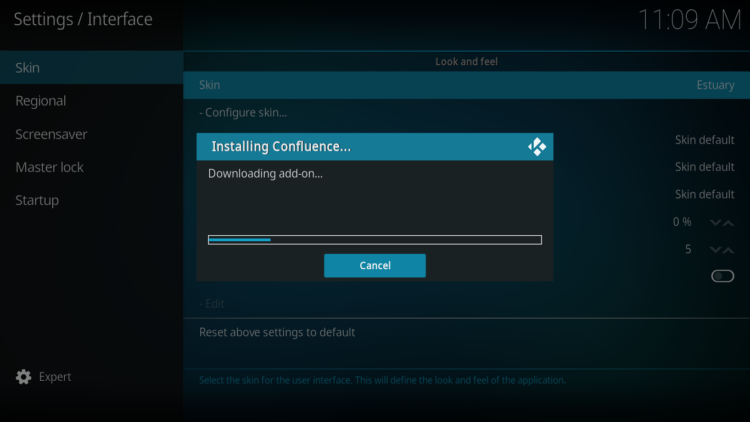
In many situations, it might be necessary to install some dependencies. The skin installer will download them automatically, so you don’t have to do anything.
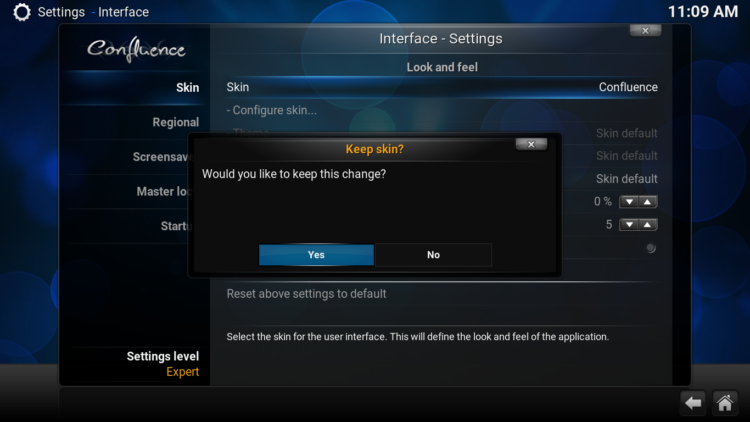
Once you have installed the skin, Kodi will ask you if you want to keep the changes and continue using the selected skin. Click Yes to accept.
And that’s all. In the same way that you have downloaded this skin, you can download and install any other by repeating the same process.
The Kodi skins you download will stay on your system, so you can activate them directly from the skins menu, even if you don’t have an internet connection. Now let’s see another method of installing skins.
How to upload Kodi Skin using a ZIP file
We are going to see how to change Kodi skins using ZIP files downloaded from third-party sources. Before starting, make sure you have a Skin compressed in ZIP format, which is accepted by Kodi. For the sake of this guide, we are going to use the Confluence Skin Zip file that you can download from here.
Once you have the file, follow these steps:
The first thing you should do is make sure that you can install files from Third-party sources. If you can’t or aren’t sure, check out this guide to enable Unknown Sources on Kodi.
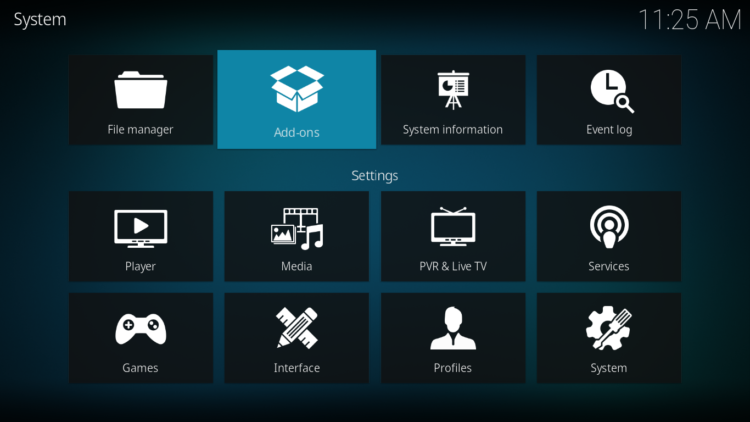
Open Kodi and from the home screen click on Settings in the main menu.
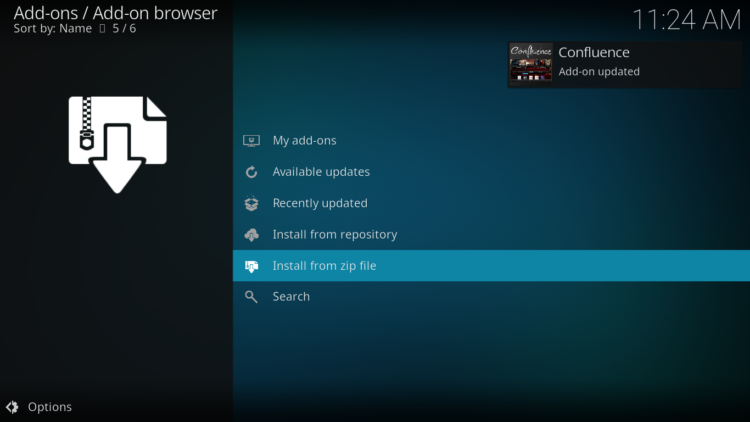
Then access the Add-ons Browser. To do this, click on the icon with an open box at the top of the left menu.
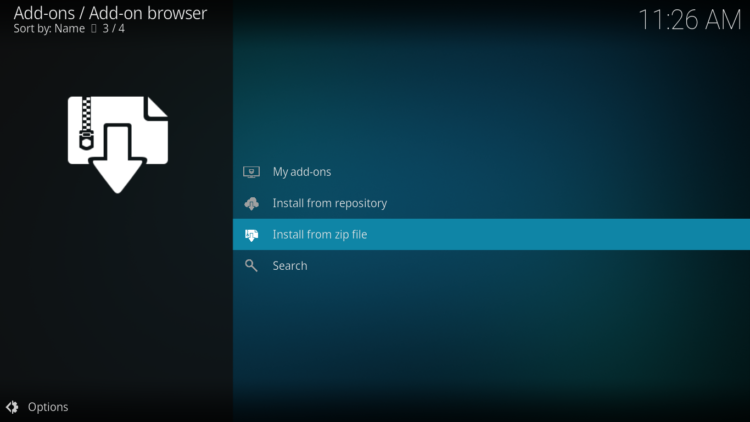
Select the option to Install from a ZIP file.
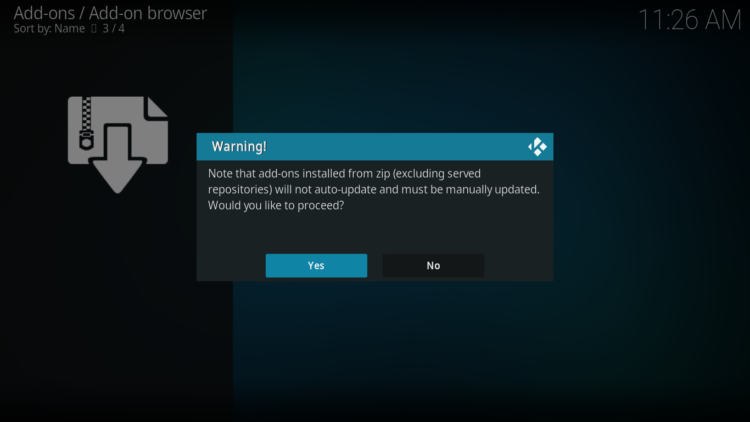
Upon this warning pop-up, click Yes
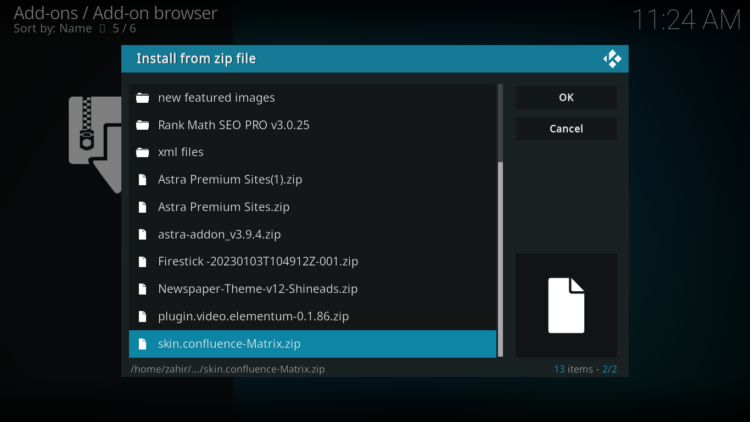
A window will open in which you must find the ZIP file that contains the skin. The path to your ZIP file should be something like Home Folder –>> Downloads
Once you find the file, click on it to install it.
The process will not take more than a few seconds.
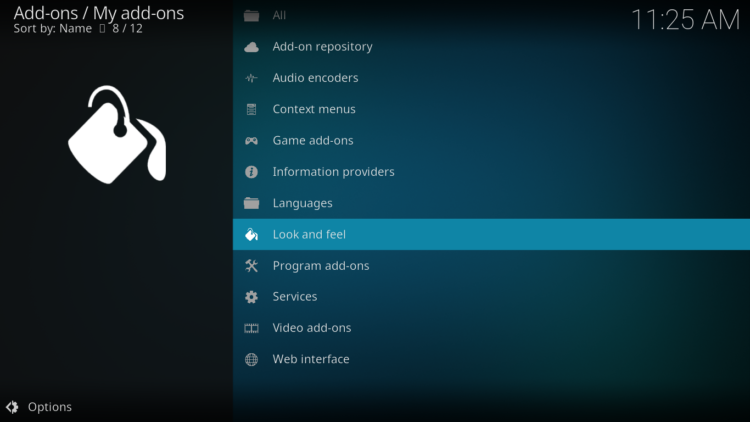
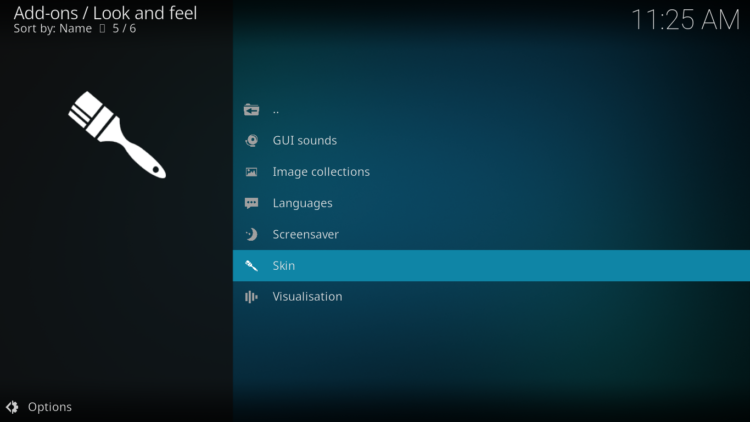
Now that the skin is installed, you will need to activate it. To do this, go to the Kodi home screen and click on Add-ons. Next, click My Add-ons, and on the right side of the screen …
… Click Look and Feel.
Click Skins.
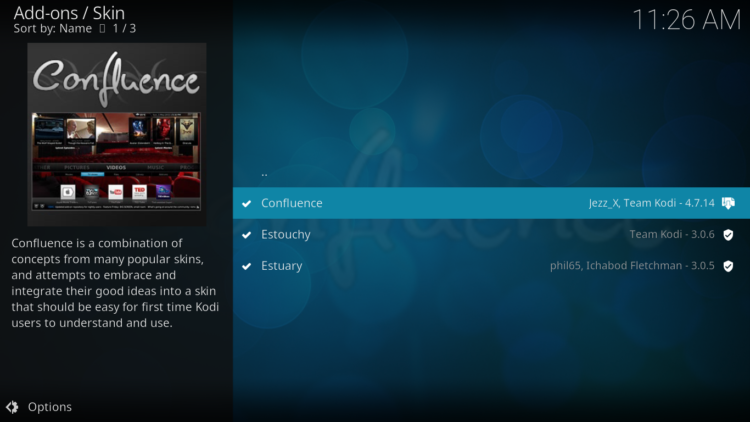
Here you must select the skin that you have downloaded and installed. Once you select it, it will automatically activate.
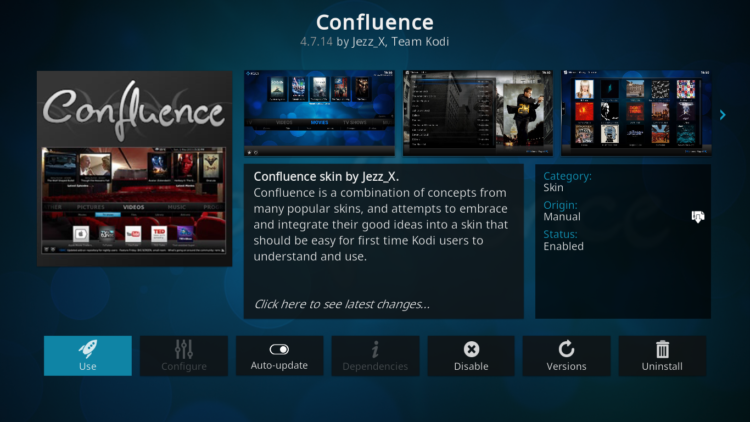
Once active, a preview window for the new skin will open, click Use to keep the skin
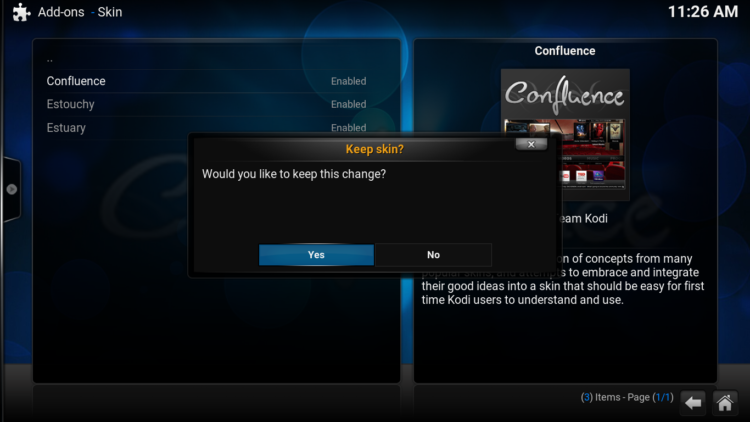
Kodi will ask you if you want to keep the changes and continue using the selected skin. Click Yes to accept.
And that’s all. Using one of these two procedures you can install any existing skin for Kodi.
As a recommendation, you can consult our ultimate Kodi guide in case you have any questions or problems. You can also check it out if you want to learn new things about Kodi.
- Kodi Guide: Ultimate Kodi Guide