This guide will show you how to install Kodi on Linux. The steps described below were realized on Kodi 19 Matrix and should work for various Linux distributions since the installation method is exactly the same.
There is a version of Kodi for Linux that will work natively on most Linux distributions and variants. The latest version of Kodi includes many updates and improvements specific to Linux, but with this you will not be forced to use a distribution that supports certain features, since Kodi will work even on those versions of Linux that are about 10 years old.
Install Kodi on Linux
We will see how to install it both on Ubuntu systems or similar, and on Debian systems or similar.
How to install Kodi on Ubuntu
Let’s see how to install Kodi on Ubuntu. These instructions will also work for other systems that are based on Ubuntu. These are the steps you must follow:
- The first thing you need to do is open a Terminal window . You can access it from Dash, by typing Terminal in the search box. You can also open a window by pressing the key combination CTRL + ALT +T .
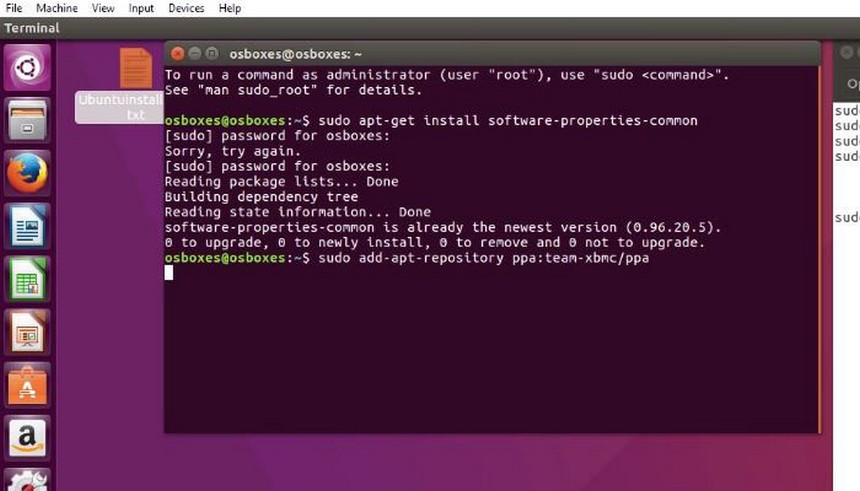
- In the terminal, type the following command and hit Enter :
sudo apt-get install software-properties-common- You will be prompted for the root user password. Enter it.
- Then enter this command :
sudo add-apt-repository ppa:team-xbmc/ppa- Next, enter the following command to update the repositories you’ve added:
sudo apt-get update- Now enter the following command to install Kodi:
sudo apt-get install kodi- You will be asked if you want to continue installing Kodi. Type Y and press Enter to accept.
By accepting, Kodi will be downloaded and installed on your system. It may take a few minutes, depending on your internet connection. When the process finishes, close the Terminal.
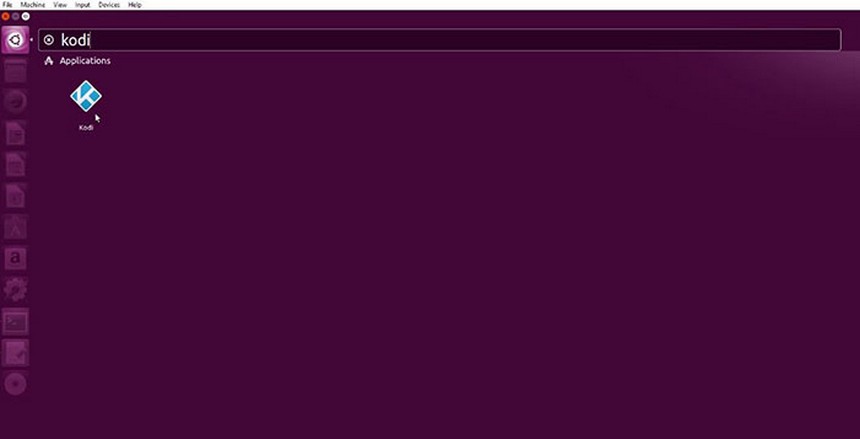
When the installation finishes, you will be able to see that Kodi is among the applications that are installed on your system. This process, as you can see, is quite simple even if you don’t use the command terminal much.
After the installation of Kodi on Linux, it is recommended that you install some files that might be necessary:
- Installation of audio codecs and other addons:
sudo apt-get install --install-suggests kodi- PVR Client Update:
sudo apt-get install kodi-pvr-mythtv- Installation of Simple IPTV:
sudo apt-get install kodi-pvr-iptvsimple- AirPlay functionality:
sudo apt-install shairplayEven if you have the audio or video codecs, it is not a bad idea to reinstall them to avoid possible problems with Kodi.
Because Ubuntu is a very widespread distribution, there is a special guide for this system that shows how to install Kodi on Ubuntu in an extended way. You can check it at the following link:
- Kodi Installation Tutorial on Ubuntu
Remember that you should always press Enter after entering any command. It may be obvious, but something that many people who have never used commands forget.
How to install Kodi on Debian
In this section, we are going to see how to install Kodi on Debian-based systems or distributions. You must follow these steps:
- The first thing you should do is create a backup copy of the sources.list file. To do this, open the terminal by pressing CTRL + ALT + T and enter this command:
sudo cp /etc/apt/sources.list /etc/apt/sources.list.bak- Pressing Enter will prompt you for the root user password .
- Let’s edit the local package index. Run the following command to edit the sources.list file with the gedit editor :
gksudo gedit /etc/apt/sources.list- If you prefer, you can use any other editor, like nano .
- Add the following line to the file:
deb http://http.debian.net/debian jessie-backports main- Save the file and close the editor.
- Now that you’ve updated the package index, let’s update the packages installed on the system:
sudo apt-get update- Finally, install Kodi by entering this command:
sudo apt-get install kodi- If a confirmation message is displayed, press Y to accept it and indicate that you really want to install Kodi.
Kodi will be downloaded and installed on your system.
When the installer finishes, you will be able to find the application among the rest of the applications that you have installed locally on your system.
How to Install Kodi on Arch Linux
Installing Kodi on Arch Linux is very easy as Kodi is available in the Arch Linux community repository. You can install it with a single command using Pacman. Follow these steps:
- The first thing you should do is open the terminal by pressing CTRL + ALT + T .
- Next, enter this command and hit Enter :
sudo pacman -S kodi- Press Y on the confirmation message you will see.
And that’s all. With this single command you will have already installed Kodi.
How to install Kodi on OpenSUSE
Kodi is also available from the Packman repository. Before installing Kodi you will have to enable the Packman repository in OpenSUSE. You must follow these steps:
- First of all, enter this command to enable the Packman repository on your system:
sudo zypper ar -f -n packman http://ftp.gwdg.de/pub/linux/misc/packman/suse/openSUSE_Leap_42.1/ packman- Now you can install Kodi. To do this, use this command:
sudo zypper install kodi- A confirmation message will be displayed. Press Y to continue with the Kodi installation.
And with this, Kodi will now be installed on your system.
The following links explain how to add media content to your kodi library:
Whether it is the first time you use Kodi or if you are a user with some experience, the following guide is recommended:
You can also check the following list with the best addons for Kodi


![Install HDtv APK on Firestick & Android TV [Live TV] (2026 Updated Guide)](https://simturax.com/wp-content/uploads/2026/07/HDTV-APK.jpeg)