C: \>Goto Addon is an all in one video addon that you can install on your kodi media center to enjoy a limitless library of movies, TV shows, and Sports in various categories.
C: \>Goto addon is located in < Where the Monsters Live> repositor. Upon tests, it has been working seamlessly on Kodi 19 Matrix
C: \>Goto addon also supports premium services like Real Debrid, Premiumize, and All Debrid.
With a Debrid account, C: \>Goto addon brings you a good deal of high-quality links including torrents so that your streaming experience is never better.
C: \>Goto addon features a very smooth menu that contains sections for Movies, TV Shows, TV Rewind, UK SOAP Rewind, Live Sports, Sports Replay, Kids, and Comedy.
The good news is that the C: \>Goto addon dedicates an entire section for live sports where you can watch you best games and competitions Live and free in the best video and audio quality that your internet can support.
How to install C: \>Goto addon on Kodi 19 Matrix
This tutorial will guide you through the different steps to follow so as to correctly install and configure C: \>Goto addon. It was carried out on Kodi 19 matrix and applies to all compatible devices including Amazon Firestick, Fire TV, Mi TV Stick, Android & IOS, Mac, Android TV, Android Boxes, etc…
NOTE: C: \>Goto addon offers most video content in English; however, you can download and use subtitles. We show you how this works with OpenSubtitles addon.
- Name: C: \>Goto – Where The Monsters Live Repository
- Source: https://www.midian.appboxes.co/repo/
- Compatibility: Kodi 19.0 Matrix
Enable installation from unknown sources
The most interesting Kodi Add-ons are included in unofficial repositories. C: \>Goto Add-on can be found in < Where The Monsters Live> repo which is a third party source. So, the first thing you have to do is enable installation from unknown sources . If not already done, just follow these steps:
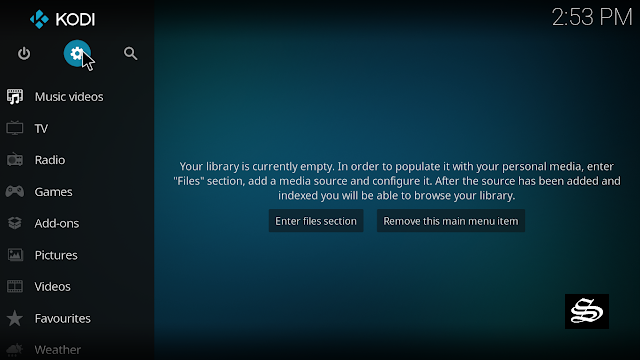
Go to the main menu and select the option “Settings” by clicking on the gear icon in the upper left panel.
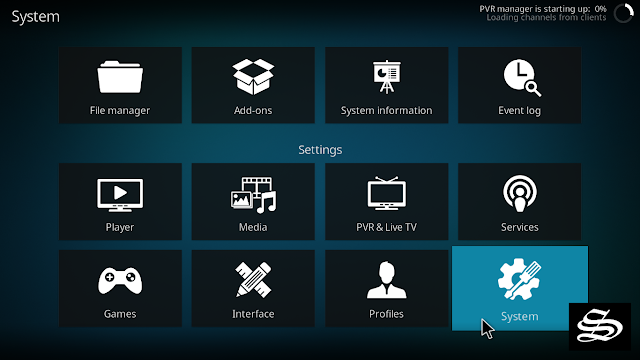
On the next page, click on “System Settings” as shown in the image below.
In the “Add-ons” tab of the left panel, make sure that the ” Unknown sources ” option is activated.
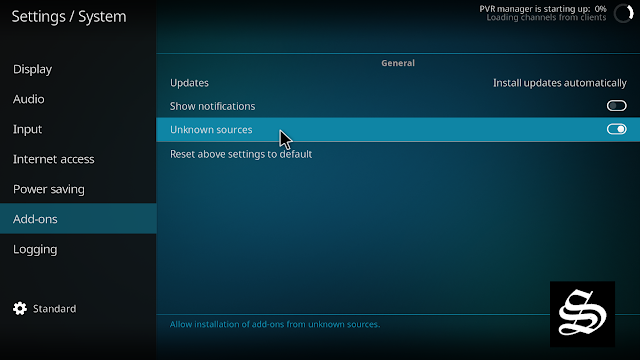
The option is disabled by default for privacy and security reasons, but you must enable it before you can install add-ons from outside the official Kodi repository.
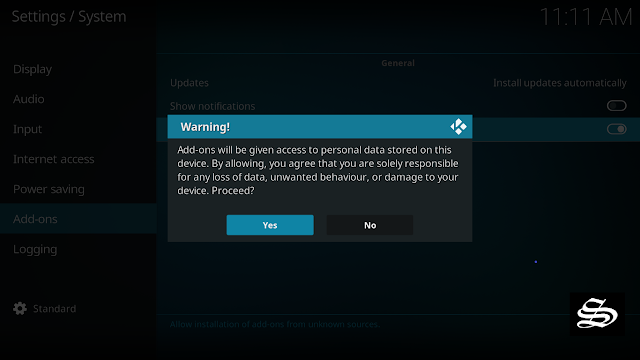
Upon this warning window, click Yes
Install Where The Monsters Live repository
Here’s a step-by-step guide on how to install Where The Monsters Live repo
To do so, follow these steps:
Launch Kodi and click on “Settings” <gear icon.>

From the available options, select «File manager»

Then select «Add source»
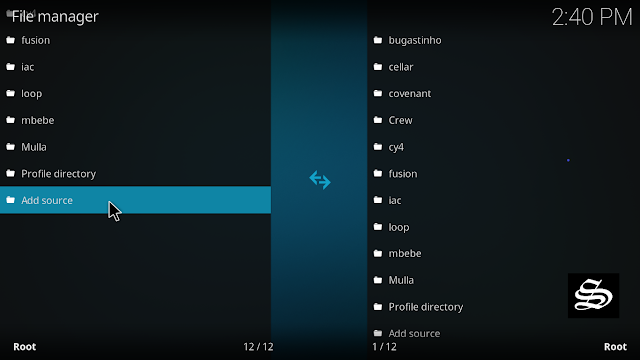
Double click «<None>»

Enter this link: https://www.midian.appboxes.co/repo/ in the box at the top of your screen. Be sure to type this exactly as provided. Click OK

You need to give a name to this media source to identify it later. Type ” midian” in the box below, then press “Ok“.

Again click OK

Return to the settings home screen, and access the Add-ons Package Installer
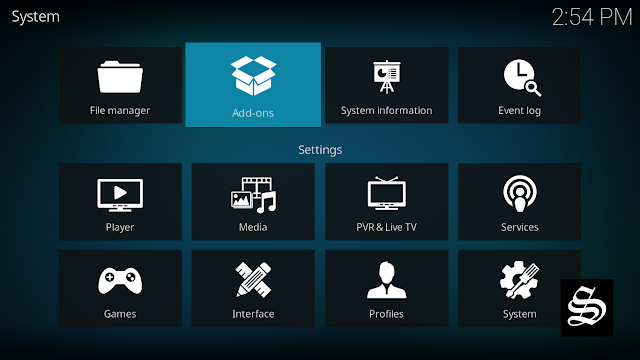
Select “Install from zip file“

A short notification will popup to warn you that addons installed from zip ( excluding served repositories) will not be auto-update and must be manually updated. Click Yes to proceed.
Find your repo you named as <midian>

Select repository.wherethemonsterslive.zip

Wait for the top right to popup Where The Monsters Live installed.

And this has been all regarding the repository installation. It is a valid process for any third party repository.
Install C: \>Goto addon on kodi 19
Now that you have Where The Monsters Live repo on your system, you need to install C: \>Goto addon.
Go to the Main Menu and Highlight Addons and click Install from repository
Select Where The Monsters Live repo

Then Video add-ons

Select C: \>Goto

Click Install

A box will popup showing all the dependencies and add-ons that will be installed. Click OK

On the top right, a pop-up will let you know that your add-on is installed

Now go back to the Kodi home screen, find the Add-ons tab on the left side menu, C: \>Goto Addon should appear under the Video add-ons category.

Setup Real Debrid in C: \>Goto addon
AS mentioned above, the C: \>Goto addon supports many premiume services like all-debrid, premiumize, and real-debrid. These services give you unrestricted access to several file hosters and can greatly improve the quality and quantity of available sources.
Before starting, make sure you have created a Real Debrid account, in case you don’t already have one. Then, launch C: \>Goto
At the very bottom of the main menu, select ACCOUNT AUTHORIZATION

On the next page choose your premium service you want to authorize. For this guide we are using Real-Debrid

Next, you will see a message showing an authorization code.

You must enter the given code in your Real Debrid account to authorize C: \>Goto access. To do this, go to this URL, enter the code displayed on Kodi and click Continue.

In case you have not accessed your Real Debrid account, you will be asked to enter your access credentials.
You may want to give a name to this new entry to easily identify it later

If everything goes well, you will see a confirmation message on Kodi indicating that the authentication in Real Debrid was successful.
And with this, you will have already configured Real Debrid in the C: \>Goto addon.

