This guide will show you how to install Horus addon on kodi 19 Matrix. With this addon you can play Acestream links on kodi and enjoy the best streaming buffer-free.
Since Plexus stopped working on Kodi 19, a great number of users have had problems playing Acestream links on kodi regardless of which platform the program is installed on.
It was missing but finally Kodi 19 can boast its own addon to display acestream links. Unlike previous versions, however, the protagonist is no longer Plexus but the new Horus addon.
Horus addon is a new Acestream link player compatible with Kodi 19 that will allow to complement with your favorite addons that offer content with Acestream links such as the Winner Sports addon and Ramses TV Arena addon.
Horus addon not only fills the gap left by Plexus but also incorporates some new and very practical function as you will see below.
Tip: For acestream, try “winner” and “horus” add-ons by camaradas repo or by winner repo. “Winner” is the best add-on for live sports, has a lot of open links and it can stands on its own. But it has also several acestream links and it needs “horus” to play them. These two together,are the successors of plexus streams. Work perfect on kodi 19!
Horus addon is available within the Camaradas Repo that we are going to install as a ZIP file manually. The file can be downloaded via this link
It should be noted that Kodi addons installed via individual ZIP files do not receive automatic updates.
Put the ZIP file in a location that can be reached from your Kodi player. The file can also be moved directly to your device via USB stick or over the network.
How to install Horus addon on kodi
In this comprehensive guide, we explain how to install Horus addon. It was realized on Kodi 19.3 Matrix, the latest stable version of Kodi, and applies to all compatible devices including Amazon Firestick, Fire TV, Mi TV Stick, Android & IOS, Mac, Android TV, Android Boxes, etc…
The process will take you through three steps:
- First, we will enable installation from unknown sources
- Second, we will add a media source from a Zip file
- Then, we will find and install the addon
- Name: Horus addon
- Source: Zip file
- Compatibility: Kodi 19.0 Matrix
Enable installation from unknown sources
If you are installing an add-on or repository from a ZIP file for the first time, the first thing you have to do is enable installation from unknown sources. If not already done, just follow these steps:
Launch Kodi and click on the “Settings” Icon.

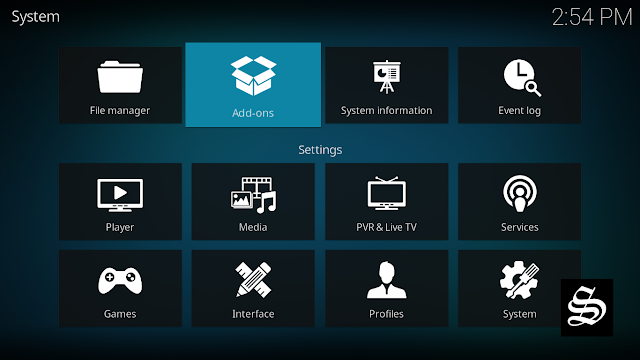
On the next page, click on “System” as shown in the image below.

In the “Add-ons” tab of the left panel, make sure that the ” Unknown sources ” option is activated.

The option is disabled by default for privacy and security reasons, but you must enable it before you can install add-ons from outside the official Kodi repository.
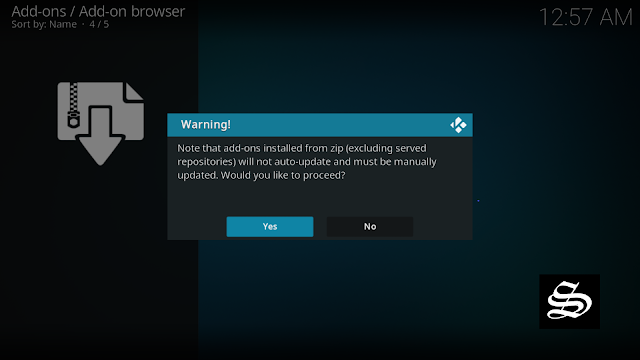
Upon this warning window, click Yes

Install Camaradas Repository from a Zip file
Installing an addon from a zip file is quite an easy process, all it takes is to download a zip file to your local storage then upload it to Kodi. This is how you can do it:
First download the .zip file from this link and remember the folder where you save it, you will be using it later.
Launch Kodi and click on the “System Settings” Icon.
Go to the System Settings home screen, and click the Add-ons Package Installer
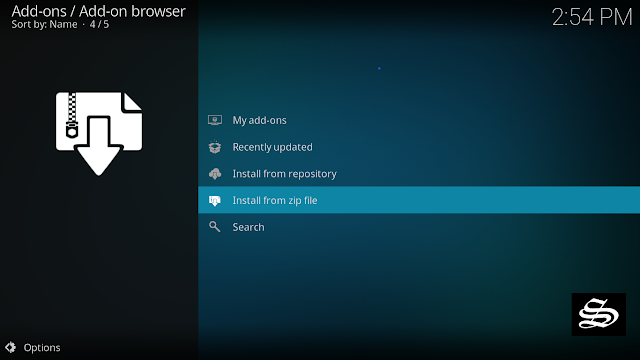
Select “Install from zip file“
A short notification will popup to warn you that add-ons installed from zip ( excluding served repositories) will not be auto-update and must be manually updated. Click Yes to proceed.
Now, in your locally stored files, find and select the Zip file you previously downloaded. Normally it should be in the Downloads folder unless you specified another path.

Reach the Downloads file

The file will have a name like .zip. The installation should start as soon as you select the file.

In a few seconds, you will be notified that Camaradas Repo installed.

And this has been all regarding the repository installation.
Install Horus addon on Kodi
Now that you have the Camaradas Repository on your system, you need to install Horus addon.
Go to Install from repository

Select Camaradas Repository

Then Program add-ons

Select Horus

Click Install

Wait until the notification appears that the Kodi addon was installed successfully

Now go back to the Kodi home screen, find the Add-ons tab on the left side menu, Horus addon should appear under the Program add-ons category.

Do I need an Acestream Player Installed on my device?
Do we need to have an Acestream Engine previously installed on the device on which we are using Acestream Links via Horus Kodi addon? This depends on the platform itself.
For Windows and Raspberry Pi users, there is no need to previously install Acestream Engine as Horus itself takes care of downloading and installing Acestream.
Android users, however, have to manually install the Acestream engine for Horus to work, for this there are 4 compatible versions . Horus will start the Acestream engine by itself and it is possible to choose the AcePlayer player as external. All of them available from the official Acestream website
Similarly to Android, Linux users need to install Acestream via Snap from the official website. Horus will start the Acestream engine by itself and you even have the option to turn off the engine at the end of playback automatically
How to use and set up Horus addon?
When you launch Horus addon, you will notice that it has a very simple interface. There is no way that you get lost. Besides Settings, the menu contains two options to play Acestream links.

- Play Acestream ID / Torrent URI: you can use this option when you have a valid Acestream ID link . You will only have to paste it in the window that will appear next, click on the OK button and wait for the link to load.

- SEARCH LINKS: you can use this option if you have a URL to a page that contains valid Acestream links.

Just paste the URL in the box and Horus will fetch the links and load the to your screen.

Now that you know how to use Horus addon to play Acestreams, there is still a little adjustment that you need to apply on the settings.
Open the Settings option from the main interface
On the Settings page, find ” Stop the Acestream Automatically” . You need to activate this option if you want to stop the Acestream Engine from running in the background when the play back is over. this will save you an important amount of RAM,


