In an era of fragmenting streaming services and rising subscription costs, the appeal of owning your content has never been higher. You don’t want to juggle five different apps just to find a movie you know you own. You want a centralized, beautiful interface that plays everything instantly.
This is the definitive android tv media library guide designed to take you from a folder of disorganized files to a Netflix-style experience running entirely on your local network.
Why Android TV?
Unlike Roku or Apple TV, Android TV (and Google TV) offers an open file system and unrestricted sideloading capabilities. This makes it the undisputed king for power users looking to build a custom media center. Whether you are using an Nvidia Shield TV Pro, a Chromecast with Google TV, or a built-in Sony/Hisense interface, the potential is limitless if you have the right tools.
Phase 1: The Hardware Foundation for Home Media Server Setup
Before installing apps, you must decide where your media will live. Your choice depends on your budget and technical comfort level regarding your home media server setup.
1. Direct Attached Storage (DAS) – The Beginner Route
The simplest method involves plugging a USB hard drive or flash drive directly into your Android TV box.
* Pros: Cheap, no network latency, works offline.
* Cons: Updating files requires unplugging the drive and moving it to a PC; requires specific file system formatting (exFAT/NTFS).
* Best For: Travelers or single-TV setups.
2. Network Attached Storage (NAS) – The Pro Route
A NAS (like Synology or QNAP) is a dedicated mini-computer that stores your files and makes them available to every device in your house over Wi-Fi or Ethernet.
* Pros: Automated downloading, centralized storage for multiple TVs, data redundancy (RAID).
* Cons: Higher upfront cost.
* Best For: Large libraries (4TB+) and 4K HDR enthusiasts.
> Pro Tip: If you are streaming high-bitrate 4K “Remux” files (50GB+ per movie), rely on Gigabit Ethernet rather than Wi-Fi to prevent buffering.
How to Set Up Google TV for Beginners: 2026 Visual Guide
Read More →Phase 2: Choosing Your Media Player Software
The “brain” of your operation. This software scans your files, downloads metadata (cover art, cast lists, plot summaries), and presents it beautifully.
Here is a quick comparison of the top three contenders to help you decide:
| Feature | Plex | Kodi | Jellyfin |
|---|---|---|---|
| Architecture | Server + Client | Standalone Player | Server + Client |
| Cost | Free / Paid (Plex Pass) | 100% Free | 100% Free |
| Setup Difficulty | Beginner/Easy | Expert/Hard | Intermediate |
| Processing | Transcodes on Server | Local Processing | Transcodes on Server |
| Remote Access | Excellent | Difficult | Good |
Option A: Plex (The User-Friendly Giant)
Plex utilizes a Server/Client model. You install the Plex Media Server on your PC or NAS, and the Plex Client on your Android TV.
* Key Features:
* Transcoding: Converts video on the fly if your TV supports the file format.
* Remote Play: Easily watch your library outside your home on mobile devices.
* Polished UI: Offers the most “Netflix-like” experience out of the box.
* Verdict: Best for ease of use and multi-room setups.
Option B: Kodi (The Customization King)
Kodi processes everything locally on the Android TV device itself.
* Key Features:
* Local Processing: Plays almost any file format without needing a server to transcode.
* Infinite Customization: Change the entire look and feel via community “skins.”
* Audio Control: Offers superior control over audio passthrough (Dolby Atmos/DTS:X).
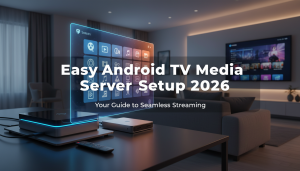
Easy Android TV Media Server Setup 2026: Your Guide to Seamless Streaming
Read More →* Verdict: Best for power users who want total control over the UI and playback.
Option C: Jellyfin (The Open Source Hero)
Similar to Plex but completely free and open-source.
* Key Features:
* No Paywalls: Hardware acceleration and other premium features are free (unlike Plex).
* Privacy: No corporate servers tracking your watch history or forcing account logins.
* Client Support: Has official apps for Android TV, Roku, and web browsers.
* Verdict: Best for privacy advocates who want a Plex experience without the corporate restrictions.
Phase 3: The Golden Rules to Organize Android TV Movies
Most enthusiasts skip this step, which creates broken libraries. Your “scrapers” (the software that identifies your movies) need clean data to organize Android TV movies correctly.
1. File Naming Conventions
Adhere to the industry standards defined by The Movie Database (TMDB).
For Movies:
> Movies / Movie Name (Year) / Movie Name (Year).mkv
> Example: Movies / The Matrix (1999) / The Matrix (1999).mkv
For TV Shows:
Android TV VPN Setup 2026: The Definitive Guide for Streaming & Privacy
Read More →> TV Shows / Show Name / Season XX / Show Name - SXXEXX - Title.mkv
> Example: TV Shows / Breaking Bad / Season 01 / Breaking Bad – S01E01 – Pilot.mkv
2. Codecs and Containers
Follow these guidelines to ensure Direct Play (playing without quality loss or buffering) on Android TV:
* Container: Standardize on MKV. It supports multiple audio tracks and subtitles efficiently.
* Video Codec: Prioritize H.265 (HEVC) for 4K content and storage efficiency. Use H.264 for maximum compatibility with older devices.
* Audio: Select AAC for universal playback. For surround sound, verify your Android TV box supports “Passthrough” to your soundbar or receiver for AC3, DTS, or TrueHD.
Phase 4: Step-by-Step Setup (Using Kodi as Example)
Since Kodi runs standalone on Android TV, it is the fastest way to start.
- Install: Download Kodi from the Google Play Store on your TV.
- Connect Source: Go to Settings > File Manager > Add Source. Browse to your USB drive or SMB (Network) share.
- Set Content: Long-press your “Movies” folder and select Change Content. Set “This directory contains” to Movies.
- Scrape: Kodi will ask to refresh information for all items. Select “Yes.”
- Enjoy: Return to the home screen. Your “Movies” tab will now be populated with posters, fan art, and cast info.
Phase 5: Advanced Enrichment Tips
Once your library is functional, elevate the experience.
* Button Mapper: Use the “Button Mapper” app to remap a useless button on your remote (like the ‘Netflix’ button) to launch Plex or Kodi instantly.
* Projectivy Launcher: Replace the ad-filled default Android TV home screen with Projectivy Launcher. It focuses purely on your local inputs and apps, making your library the star of the show.
* Automated Acquisition: Look into the “arr” stack (Radarr, Sonarr) for your PC/NAS to automate the organizing and renaming of files before they even reach your library.
Conclusion
Building a local media library is an investment in your entertainment freedom. By following this android tv media library guide, you have moved away from the reliability of streaming algorithms and built a robust, high-quality, personal cinema.
Start small—organize a few movies, test a player—and before long, you’ll have a setup that rivals the giants.