Do you ever feel like your Amazon Fire TV device is constantly battling for breath, sputtering out “Critically Low Storage” warnings right when you’re about to binge your favorite show? You’re not alone! Many Fire TV users, especially those with older models, quickly hit a wall with limited internal memory. From streaming apps to downloaded content and accumulated cache, that precious space vanishes faster than popcorn at a movie night. For instance, while many devices boast 8GB, the Fire OS and pre-installed apps can gobble up over 3GB, leaving you with a mere 5GB of usable space. Even the newer Fire TV Stick 4K Max (2nd Gen) with 16GB offers only about 12GB after system files!
This isn’t just an annoyance; low storage cripples your Fire TV’s performance. You’ll experience frustrating lag, app crashes, and the inability to install new content or update existing apps. But what if we told you there’s an easy, comprehensive solution that puts you back in control?
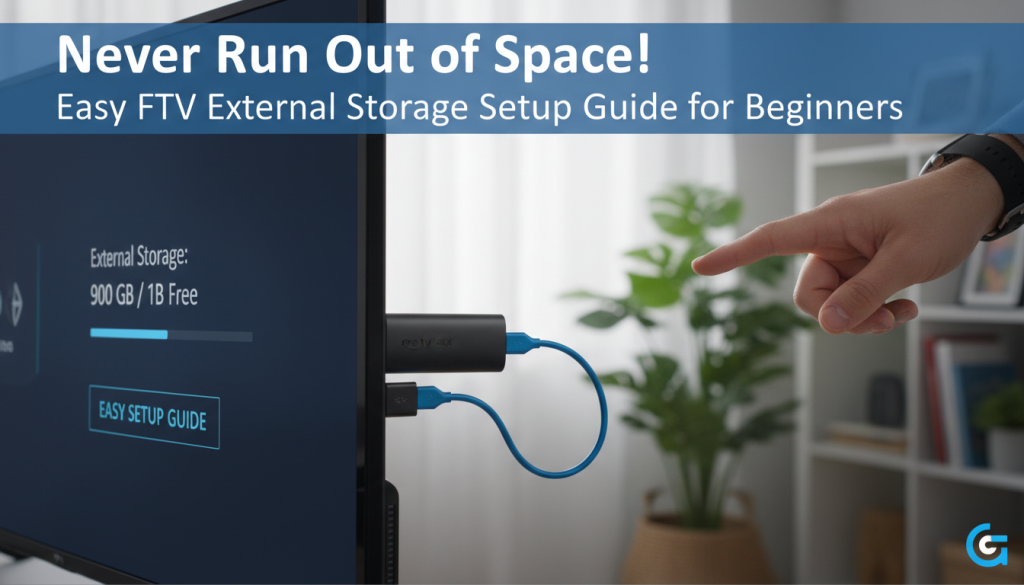
This fire tv external storage setup guide is your friendly, expert roadmap to reclaiming your streaming freedom. We’ll walk you through everything from simple internal optimizations to seamlessly adding external USB storage, ensuring you understand each step and feel confident tackling it. No more outdated guides or confusing technical jargon – just clear, actionable instructions to expand fire tv memory guide and unleash your Fire TV’s full potential!
Before You Expand: Optimizing Your Fire TV’s Internal Storage (The First Step)
Before we even think about external storage, let’s give your Fire TV a quick “spring clean.” Optimizing its internal memory can significantly improve performance and make the eventual fire tv storage upgrade instructions even more effective. Think of it as preparing a fresh canvas!
First, let’s see what we’re working with:
1. From the Fire TV home screen, navigate to Settings (the gear icon).
2. Select My Fire TV (or Device & Software on some models).
3. Go to About.
4. Select Storage. Here, you’ll see a breakdown of your internal space.

Now, let’s free up some space:
Quick Wins: Freeing Up Space on Your Fire TV
* Clear App Cache: Applications store temporary data (cache) to speed things up, but this accumulates over time. Regularly clearing it can free up substantial space without affecting your login or saved settings.
1. Go to Settings > Applications > Manage Installed Applications.
2. Select an app (start with popular streaming apps like Netflix, Hulu, YouTube, or Kodi.
3. Choose “Clear Cache“.
* Identify and Uninstall Unused Apps: We all have those “just in case” apps. Review your list and uninstall any “hog apps” or those you rarely use. This frees up both storage and valuable RAM.
1. Go to Settings > Applications > Manage Installed Applications.
2. Select the app you want to remove.
3. Choose “Uninstall“.
* When and How to Clear App Data: This is a more drastic step. Clearing app data resets an app to its initial state, deleting login information, saved settings, and any downloaded content within that app. Use this if clearing cache isn’t enough, but be prepared to log back in.

The Ultimate Fire TV Smart Home Dashboard Setup Guide: Native Controls, Automation & Sideloading
Read More →1. Go to Settings > Applications > Manage Installed Applications.
2. Select the app.
3. Choose “Clear Data” (confirm when prompted).
* Remove Sideloaded APK Files: If you’ve sideloaded apps using tools like Downloader, the installer APK files often remain. These are no longer needed once the app is installed and can be quite large.
1. Open the Downloader app.
2. Navigate to the “Files” section.
3. Select any .apk files you’ve installed and delete them.
* Manually Offload Apps: Fire OS includes an “offloading” feature that uninstalls an app to free storage but preserves its data and settings. Offloaded apps remain on your home screen with a cloud icon. Fire TV devices automatically offload unused apps after 60 days of inactivity, but you can do it manually. However, be aware that this feature may not offload all third-party apps or those with active subscriptions.
* Force Stop Background Apps: Apps can run silently in the background, consuming resources. Force-stopping them can free up memory and improve responsiveness.
1. Go to Settings > Applications > Manage Installed Applications.
2. Select an app.
3. Choose “Force Stop“.
* Disable Data Monitoring: Your Fire TV tracks app data consumption, which uses system resources. You can disable this for a tiny performance boost.
1. Go to Settings > Preferences > Data Usage Monitoring.
2. Toggle it Off.
* Check for System Updates: Always ensure your Fire TV device is running the latest Fire OS version. Updates often include bug fixes and performance improvements that can help manage storage more efficiently. Also, check for individual app updates in notifications.
1. Go to Settings > My Fire TV (or Device and Software) > About > Check for Update.
* Factory Reset (Last Resort): If all else fails and persistent low storage issues continue, a factory reset will wipe all data and restore your device to its factory settings. This often resolves deep-seated storage errors but requires you to set up your device and reinstall apps from scratch. Be aware that in rare cases, even after a factory reset, storage issues might persist, potentially indicating damaged internal storage.
Choosing Your External Storage: The Right Fit for Your Fire TV
Now that your internal storage is optimized, let’s dive into the core of this fire tv external storage setup guide: selecting the right external drive. This choice is critical for a smooth experience, and understanding your options will help you make the best decision.
USB Drives vs. SSDs vs. Network Storage: What’s Best for You?
Let’s compare the most common types of external storage you might consider for your Fire TV:
| Feature | USB Flash Drive | External SSD | Network Attached Storage (NAS) |
| Pros | • Highly portable & compact • Very affordable • Low power consumption | • Blazing fast read/write speeds • Durable (no moving parts) • Highly reliable | • Massive storage (Terabytes) • Centralized media library • Accessible by all home devices |
| Cons | • Slower than SSDs • Finite write cycles • Easy to lose or misplace | • Higher cost per GB • May require a powered USB hub | • Complex initial setup • Relies on network stability • Not meant for app installs |
| Ideal Use Case | Expanding storage for a few extra apps or small media files. | Maximizing performance for heavy apps and games on a single device. | Streaming massive movie/music libraries via Plex or Kodi to multiple rooms. |
| Power Needs | Low: Usually powered directly by the Fire TV. | Moderate to High: Often requires a powered USB hub to function. | Independent: Has its own power supply; doesn’t draw from Fire TV. |
| Typical Capacity | 32GB – 128GB | 128GB – 512GB (Up to 2TB) | Unlimited (Scalable based on hard drives) |
Compatibility Matrix: Specific Considerations
Firestick Setup for Beginners Seniors: Easy Step-by-Step Guide
Read More →* Fire TV Stick (All Models including 4K Max): These devices typically have a micro-USB port that serves for power only. To connect any USB storage, you must use a USB OTG (On-The-Go) cable or adapter. This splits the micro-USB port into a power input and a standard USB-A port for your drive. This is crucial for “how to add external storage to fire tv stick 4k” setups.
* Fire TV Cube (All Generations): Fire TV Cubes come with standard USB-A ports, making direct connection of a USB drive much simpler. No OTG cable is needed.
* Fire TV Omni/Smart TVs: These devices usually have multiple standard USB-A ports, offering the most straightforward connection.

Key Considerations: The Nitty-Gritty Details
* USB Speed (2.0 vs. 3.0): While Fire TV devices might only have USB 2.0 speeds internally, using a USB 3.0 drive is highly recommended for “best usb drive for fire tv storage expansion.” They offer better performance, are more reliable, and are backward compatible. Don’t settle for ancient USB 2.0 drives if you can avoid it.
* Power Requirements: The Mighty Powered Hub or Mission Cable:
For smaller USB flash drives, a standard unpowered OTG cable (essential for Fire TV Sticks) might provide enough power. This simple setup can work for basic storage expansion.
However, if you’re using external hard drives, larger capacity flash drives, or connecting multiple USB peripherals like a keyboard, mouse, or Ethernet adapter via a usb hub fire tv, a standard unpowered OTG setup often won’t suffice. Insufficient power can lead to frustrating “boot loops” (where your Fire TV constantly restarts) or unrecognized devices, crippling your setup.
To ensure stable operation, especially for Fire TV Sticks, a powered USB hub (with its own external power adapter) or a specialized “Mission power cable” is highly recommended. This ensures consistent power delivery to both your Fire TV and the connected external drive, making it a reliable “firestick storage solution tutorial.” Some users even suggest charging the Mission power cable for 10 minutes before first use to ensure it stores adequate power.
* Capacity: While Fire TV devices can often recognize large drives, for flash drives, capacities up to 128GB are commonly mentioned for transferring files smoothly, and external hard drives up to 2TB have been successfully used.
Formatting: This is critical! For optimal functionality, especially for installing apps directly to external storage, the drive must* be formatted by the Fire TV as “internal storage” (sometimes called “device storage”). If you format it as “external storage,” it will likely only be suitable for media consumption (photos, videos) and not for app installation. If your USB drive isn’t recognized at all by the Fire TV, you might need to format it to FAT32 on a computer first, then re-connect it to the Fire TV.
* Device Compatibility: Expanding storage is significantly easier and more seamless on newer Fire TV models, particularly the Fire TV Stick 4K Max (2nd Gen), as they offer better native support for adopting external storage as internal memory. Older Fire TV devices may require more complex workarounds or specific applications to manage external storage effectively.
DIY Step-by-Step Setup: Expanding Storage for Your Fire TV
Now for the hands-on part! This beginner’s guide fire tv external storage setup will walk you through the process of setting up your chosen external drive. It’s easier than you might think!
The Basics: Connecting and Formatting Your USB Drive
What you’ll need:
* Your Fire TV device (Stick, Cube, etc.)
* A USB drive (flash drive or external SSD/HDD)
* For Fire TV Sticks: A USB OTG cable or adapter.
* (Optional, but highly recommended for stability): A powered USB hub or Mission power cable.
#### Step 1: Connect the Drive

How to Jailbreak Firestick: Ultimate Guide (Lite, 4K Max, Cube)
Read More →This step varies slightly depending on your Fire TV model.
* For Fire TV Stick (via OTG Cable):
1. Disconnect your Fire TV Stick from its power adapter.
2. Plug the micro-USB male end of your OTG cable into the micro-USB port on your Fire TV Stick.
3. Plug your USB drive into the standard USB-A port on the OTG cable.
4. Plug your Fire TV Stick’s original power adapter (or the power adapter for your powered USB hub/Mission cable) into the micro-USB female port on the OTG cable.
5. Connect the Fire TV Stick (with the OTG setup) back into your TV’s HDMI port.

* For Fire TV Cube or Omni/Smart TVs:
1. Simply plug your USB drive directly into an available standard USB-A port on your Fire TV Cube or TV.
2. If using an external hard drive, ensure it has its own power supply or is connected via a powered USB hub.
#### Step 2: Format for Fire TV
Once connected, your Fire TV should detect the new storage. If it doesn’t immediately prompt you, here’s how to format it:
1. From the Fire TV home screen, navigate to Settings (the gear icon).
2. Select My Fire TV.
3. Scroll down and look for USB Drive. Select it.
4. You should now see your connected USB drive listed. Crucially, select the option to “Format to Internal Storage” (or “Device Storage,” depending on your Fire OS version and region).
* Why “Internal Storage” is vital: This tells your Fire TV to treat the external drive as an extension of its built-in memory, allowing you to install apps, app data, and updates directly onto it. If you choose “Format to External Storage,” it will primarily be used for media (photos, videos) and will not allow app installation.
5. Confirm the formatting when prompted. This process will erase all data on the USB drive, so make sure it’s empty or backed up!

#### Step 3: Verify Setup

Firestick vs. Mi TV Stick: The Ultimate Comparison Guide for Smart Streamers
Read More →After formatting is complete, your Fire TV will likely restart. Once it’s back up:
1. Go back to Settings > My Fire TV > About > Storage.
2. You should now see your total storage capacity significantly increased, reflecting the newly integrated external drive. You’ve successfully completed the fire tv stick external drive setup!

Install and Manage Apps on Your Expanded Storage
1. Install New Apps: Once formatting is complete, any new apps you install that support external storage will automatically be directed to the newly expanded storage space. This is a game-changer for your fire tv apps storage!
2. Move Existing Apps (if supported): To move apps already installed on your internal storage:
1. Go to Settings > Applications > Manage Installed Applications.
2. Select an app from the list.
3. If the app is compatible with being moved, you will see an option like “Move to USB Storage“. Tap this to transfer it.
* Important Note: Not all apps support being moved to external storage. This is a developer decision. For example, essential Amazon apps or core streaming services like Netflix might not allow it, while Kodi often does.
3. Direct Installation for Sideloaded Apps: For diy fire tv storage hack for apps, some third-party app stores (like Aptoide TV) allow you to directly select the external drive as the installation location, bypassing the need to move them later.
4. Recording Media: If you plan to use your external storage for recording live TV via apps like TVMate, remember to select the external drive as the recording destination within the app’s settings, as it may default to internal storage.
Important Considerations: Ejecting or physically removing the USB drive will make any apps installed on it disappear from your Fire TV’s home screen. Reconnecting the drive will automatically make those apps available again.
With these steps, you’ve successfully learned how to leverage your expanded storage for both new and existing applications, ensuring your Fire TV remains fast and functional. While direct USB expansion covers most needs, there are even more advanced ways to manage your Fire TV’s storage and media, which we’ll explore next.
Advanced Storage Hacks: Beyond Basic USB
While directly adding a USB drive is the most common and effective way to increase fire tv storage capacity steps, some advanced users might explore other avenues for specific needs.
Unlocking More Potential: Network Storage & App Migration
* Network Attached Storage (NAS) Integration (SMB/NFS):
While Fire OS doesn’t natively integrate NAS for app storage, it’s an incredibly powerful solution for centralizing your media library. Why use NAS? Imagine having terabytes of movies, TV shows, and music accessible to not just your Fire TV, but all devices on your home network, without consuming any local Fire TV storage.
* How it works: Apps like Kodi (excellent for kodi fire tv storage of media), Plex, or even basic file explorers (like X-plore File Manager) can be configured to access media files stored on your NAS.
* Basic Setup: This typically involves setting up a shared folder on your NAS (using protocols like SMB/CIFS or UPnP/DLNA) and then configuring the media app on your Fire TV to connect to that network share. For example, in Kodi, you’d add a video source and browse for a network location.

Best Fire TV Alternatives for 2026: Top Picks & Comparisons
Read More →* Complexity: Setting up a NAS requires some technical know-how for network configuration, but it’s a fantastic long-term solution for media enthusiasts.
* Cloud Storage Integration:
Fire TV devices, being Amazon products, integrate seamlessly with Amazon Photos for cloud photo and video storage. You can view your cloud library directly on your Fire TV. Other cloud services like Google Drive or Dropbox might be accessible via their respective apps, but generally, this is for media viewing/streaming, not for installing applications directly.
* ADB Sideloading to External (Advanced):
For highly technical users, Android Debug Bridge (ADB) commands can offer more granular control. In theory, ADB might allow for the installation of certain apps to designated external paths. However, this is complex, often unsupported by Amazon, and can lead to instability if not done correctly. Fire OS generally does not support “adoptable storage” in the same robust way that standard Android does, where an SD card can be truly merged with internal storage and fully utilized by all apps. This method is not recommended for beginners.
Performance Optimization & Best Practices
Adding external storage is just the beginning! To truly maximize speed and reliability, follow these best practices for your newly expanded setup.
* The Importance of Using a Powered USB Hub (Especially for [Fire TV Sticks):
We can’t stress this enough. If you’re connecting an external hard drive, multiple peripherals, or even some larger capacity flash drives to a Fire TV Stick, a powered USB hub or Mission power cable is non-negotiable. It ensures stable power delivery, preventing frustrating boot loops, device crashes, or unrecognized drives. Consistent power is the bedrock of reliable amazon firestick storage expansion.
* Why Choosing Fast Drives (USB 3.0) Can Improve Performance:
While your Fire TV’s internal USB controller might operate at USB 2.0 speeds, a fast USB 3.0 flash drive or an external SSD will still offer significantly better internal read/write speeds. This translates to faster app loading, smoother navigation, and an overall snappier experience for your fire tv external storage setup guide.
* Best Practices for Avoiding Abrupt Disconnection and Safely Handling External Drives:
Treat your external drive like part of your Fire TV. Avoid abruptly pulling it out, especially when the Fire TV is active or apps are running from it. If you need to remove it, it’s best to power down the Fire TV first or, if available, use an “eject” option in the settings (though this isn’t always present for internal-formatted drives).
* Keeping Your Fire TV OS Updated for Improved Storage Management:
As mentioned earlier, regularly checking for and installing Fire OS updates is crucial. Amazon frequently rolls out patches and improvements that can optimize how your device handles internal and external storage, leading to better stability and performance.
* Tips for Regular Maintenance of Your External Storage:
Even with external storage, continue to periodically clear the cache for apps. Temporary files can accumulate on both internal and external storage, impacting overall system responsiveness. Regularly monitor your storage usage via Settings > My Fire TV > About > Storage to understand how your space is being utilized and proactively manage it.
Troubleshooting Common Fire TV Storage Issues
Even with the best intentions, technical hiccups can occur. Don’t worry, they’re often easily fixable! This section is designed to build your confidence, offering solutions to common problems you might encounter with your fire tv external storage setup guide.
Help! My External Storage Isn’t Working: Solutions to Common Problems
Deep Dive: “USB Drive Not Recognized/Showing Up”
If your Fire TV isn’t detecting your external drive, it’s one of the most common frustrations. Here’s a systematic approach to get it working:
The #1 List: Best Free Live TV Apps for Firestick 2026 (Stream Smarter, Save Money)
Read More →- Check Physical Connection: Is everything plugged in securely? For Fire TV Sticks, double-check that the OTG cable is firmly seated in the Fire Stick, the USB drive in the OTG, and the power cable in the OTG.
-
Reboot Fire TV: A simple restart can often resolve minor recognition glitches. Go to
Settings > My Fire TV > Restart. - Try Another Port/Cable: The culprit could be a faulty USB port on a hub, or a damaged OTG cable. If possible, try connecting the drive to a different port, or swap out the OTG cable with another one.
- Verify Drive Format on PC (Pre-formatting): If the Fire TV doesn’t even prompt you to format, it might not recognize the drive’s initial file system. Connect the USB drive to a computer and ensure it’s formatted as FAT32. Many new drives come formatted as NTFS, which Fire TV might not recognize initially for its “internal storage” formatting option. After formatting to FAT32 on a PC, reconnect it to your Fire TV and try the “Format to Internal Storage” option again.
- Address Power Supply Issues: This is especially relevant for external hard drives or if you’re experiencing “boot loops.” If the drive isn’t getting enough power, it won’t show up. Switch to a powered OTG cable, a Mission power cable, or a powered USB hub.
- Test the Drive on Another Device: Connect your USB drive to a computer or another device to ensure the drive itself is not faulty.
* Fire TV Stuck in a Boot Loop:
This is almost always a power issue. Your external drive is drawing too much power, and the Fire TV cannot maintain stable operation, causing it to constantly restart.
* Solution: Immediately switch to a powered OTG cable, a Mission power cable, or a powered USB hub. Disconnect the external drive and reboot your Fire TV. Once stable, reconnect the drive via the powered setup.
* Apps Won’t Move to External Storage:
* App Compatibility: This is the most frequent reason. Not all apps are developed to support installation or movement to external storage. This is a decision by the app developer, and there’s often no workaround for incompatible apps. Essential system apps or some core streaming apps often fall into this category.
* Incorrect Formatting: Double-check that your external drive was formatted as “internal storage” (or “device storage”) by the Fire TV, not “external storage.” If it was formatted incorrectly, you’ll need to reformat it.
* “Critically Low Storage” Error Persists After Expansion/Cleaning:
This can be frustrating after all your effort.
* Hidden Files/Bugs: Even after cleaning and expanding, some users report persistent low storage. This could be due to hidden system files, corrupted data, or a software bug.
* System/App Updates: Ensure your Fire TV OS and all individual applications (check notifications for updates!) are fully updated, as bug fixes often address such issues.
* Internal Memory Degradation: In very old devices, the flash memory can degrade over time due to a finite number of write cycles. If all other troubleshooting fails, a factory reset might be necessary. If the problem persists even after a reset, the device’s internal storage might be failing, indicating a potential hardware issue.
* Sync Amazon Content: Some users have reported success by syncing Amazon content in Settings > Account > Sync Amazon Content. This sometimes clears up internal discrepancies.
* Contacting Amazon Support: If you’ve tried everything and the issue persists, don’t hesitate to contact Amazon Support. Provide them with details of your Fire TV model, the external storage you’re using, and all the troubleshooting steps you’ve already taken.
Conclusion: Enjoy Your Expanded Fire TV Experience!
Congratulations! By following this fire tv external storage setup guide, you’ve transformed your Fire TV from a cramped, struggling device into a powerhouse of entertainment. No more frustrating “Critically Low Storage” pop-ups, no more deleting beloved apps, and no more performance bottlenecks. You’ve successfully implemented fire tv storage upgrade instructions and now have the space to truly explore all the apps, games, and media your Fire TV has to offer without limits.
We hope this beginner’s guide fire tv external storage setup has built your confidence and made what seemed like a complex technical task feel achievable and even empowering. Enjoy your expanded storage, smoother performance, and endless streaming possibilities!
—
Ready to dive deeper or have a tip to share? Leave a comment below or explore our other Fire TV guides for more ways to optimize your streaming setup!